
Back Up Your Mac With Time Machine


Learn how to create a backup of the files on your Mac.
Time Machine is the built-in backup feature of your Mac, designed to automatically back up your personal data, including apps, music, photos, email, and documents. This guide will walk you through the process of setting up Time Machine to ensure you have a backup of your files.
Step 1: Connect a Backup Storage Device
Attach an external drive, such as a USB or Thunderbolt drive, to your Mac. This should be used exclusively for Time Machine backups and have at least twice the storage capacity of the data you’re backing up. If space is insufficient, Time Machine will alert you.
Step 2: Choose the Storage Device in Time Machine Settings
When you connect the drive, you might be prompted to use it for Time Machine. If not, use these steps:
For macOS Ventura or Later:
- Go to Apple menu > System Settings.
- Click General > Time Machine.
- Click the add button (+) and follow instructions.
For Earlier macOS Versions:
- Go to Apple menu > System Preferences.
- Click Time Machine > Select Backup Disk.
- Follow instructions.
If the drive has backups from another Mac, you can claim them or start fresh.
Step 3: Start the Backup
Back up automatically. After you select your storage device in Time Machine settings, Time Machine automatically begins making periodic backups.
Back up manually. To start a backup manually, without waiting for the next automatic backup, choose Back Up Now from the Time Machine menu  in the menu bar.
Check backup status. Use the Time Machine menu in the menu bar to check the status of a backup or skip a backup in progress. For example, if a backup is underway, the menu shows how much of it is done. When a backup is not underway, the menu shows the date and time of the latest backup.
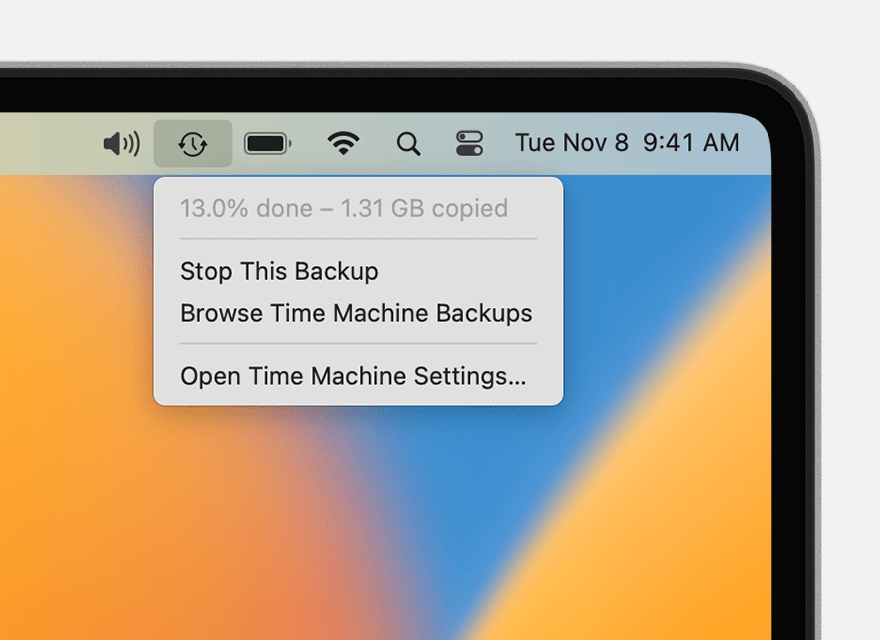
Backup is underway
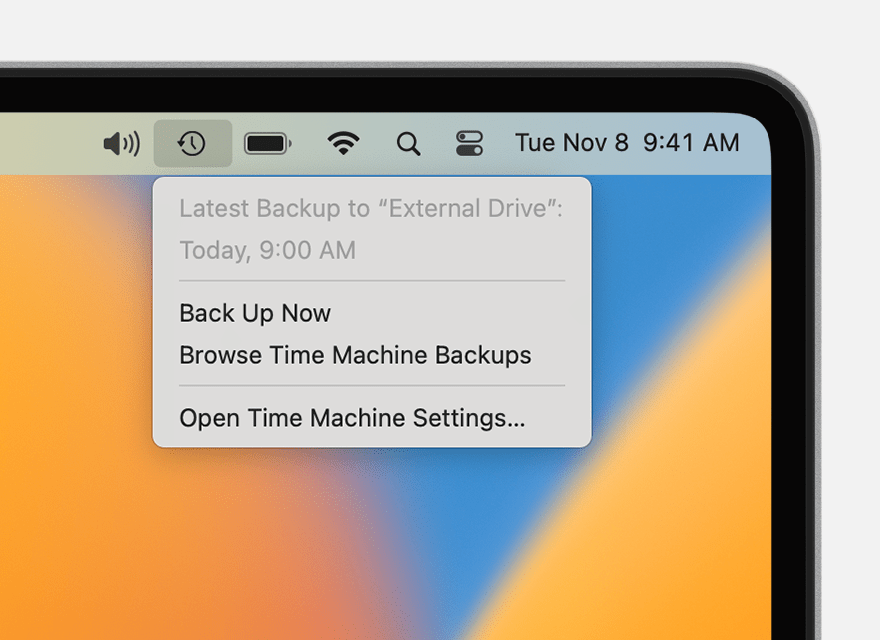
Backup is completed
Step 4: Monitor Backup Progress and Frequency
The Time Machine menu shows ongoing backup progress or the date and time of the last backup. Time Machine initially makes hourly backups for 24 hours, daily for a month, and weekly for all past months, deleting the oldest backups if space runs out. From macOS Ventura onward, you can adjust the backup frequency in Time Machine settings.
Conclusion
Using Time Machine ensures your Mac data is securely backed up. Remember, the first backup may take time, but subsequent ones will be quicker since only changed files are backed up.
Share via: